Finding King Tut’s final resting place in the Egyptian desert wasn’t an accident. Nor was locating the Titanic in the briny depths of the Atlantic.
Those credited with these discoveries did two key things: They had the tools needed for the job, and they knew where they were heading. They didn’t aimlessly float in the ocean or wander the desert empty-handed.
While locating moisture inside a house might not put you in the history books, testing for it also requires:
- Knowing where to look
- Having a moisture meter for home inspections (and other necessary equipment) on hand
With a methodical and systematic approach, you’re able to complete moisture surveys that fully detail moisture’s presence inside a home with confidence. What’s more, you’re able to provide a final report that’s
Home Moisture Inspections: Where to Check for Moisture
Completing a comprehensive home moisture inspection means being thorough. And it also means having the right tools at the ready – primarily a moisture meter for home inspections.
Regardless of size, homes have plenty of places to inspect for moisture. Some spots to check are no-brainers, while others are easy to forget about or pass by.
The Obvious Spots
During a home moisture inspection, these spots are standard places to test:
- Walls and ceilings
- Concrete basement floors
- Attics
- Crawlspaces
- Around windows and doors
1. Walls & Ceilings
Among the first places tested during a home inspection, walls and ceilings are good barometers for moisture presence in a home. Both drywall (sheetrock) and plaster are extremely porous and absorb moisture quickly to equilibrate with their immediate environment.
When a moisture issue, such as a leak, starts to become a major problem, walls and ceilings make it immediately apparent -- you’ll likely notice:
- Cracks & crumbling
- Stains
- Flaking paint
- A musty odor
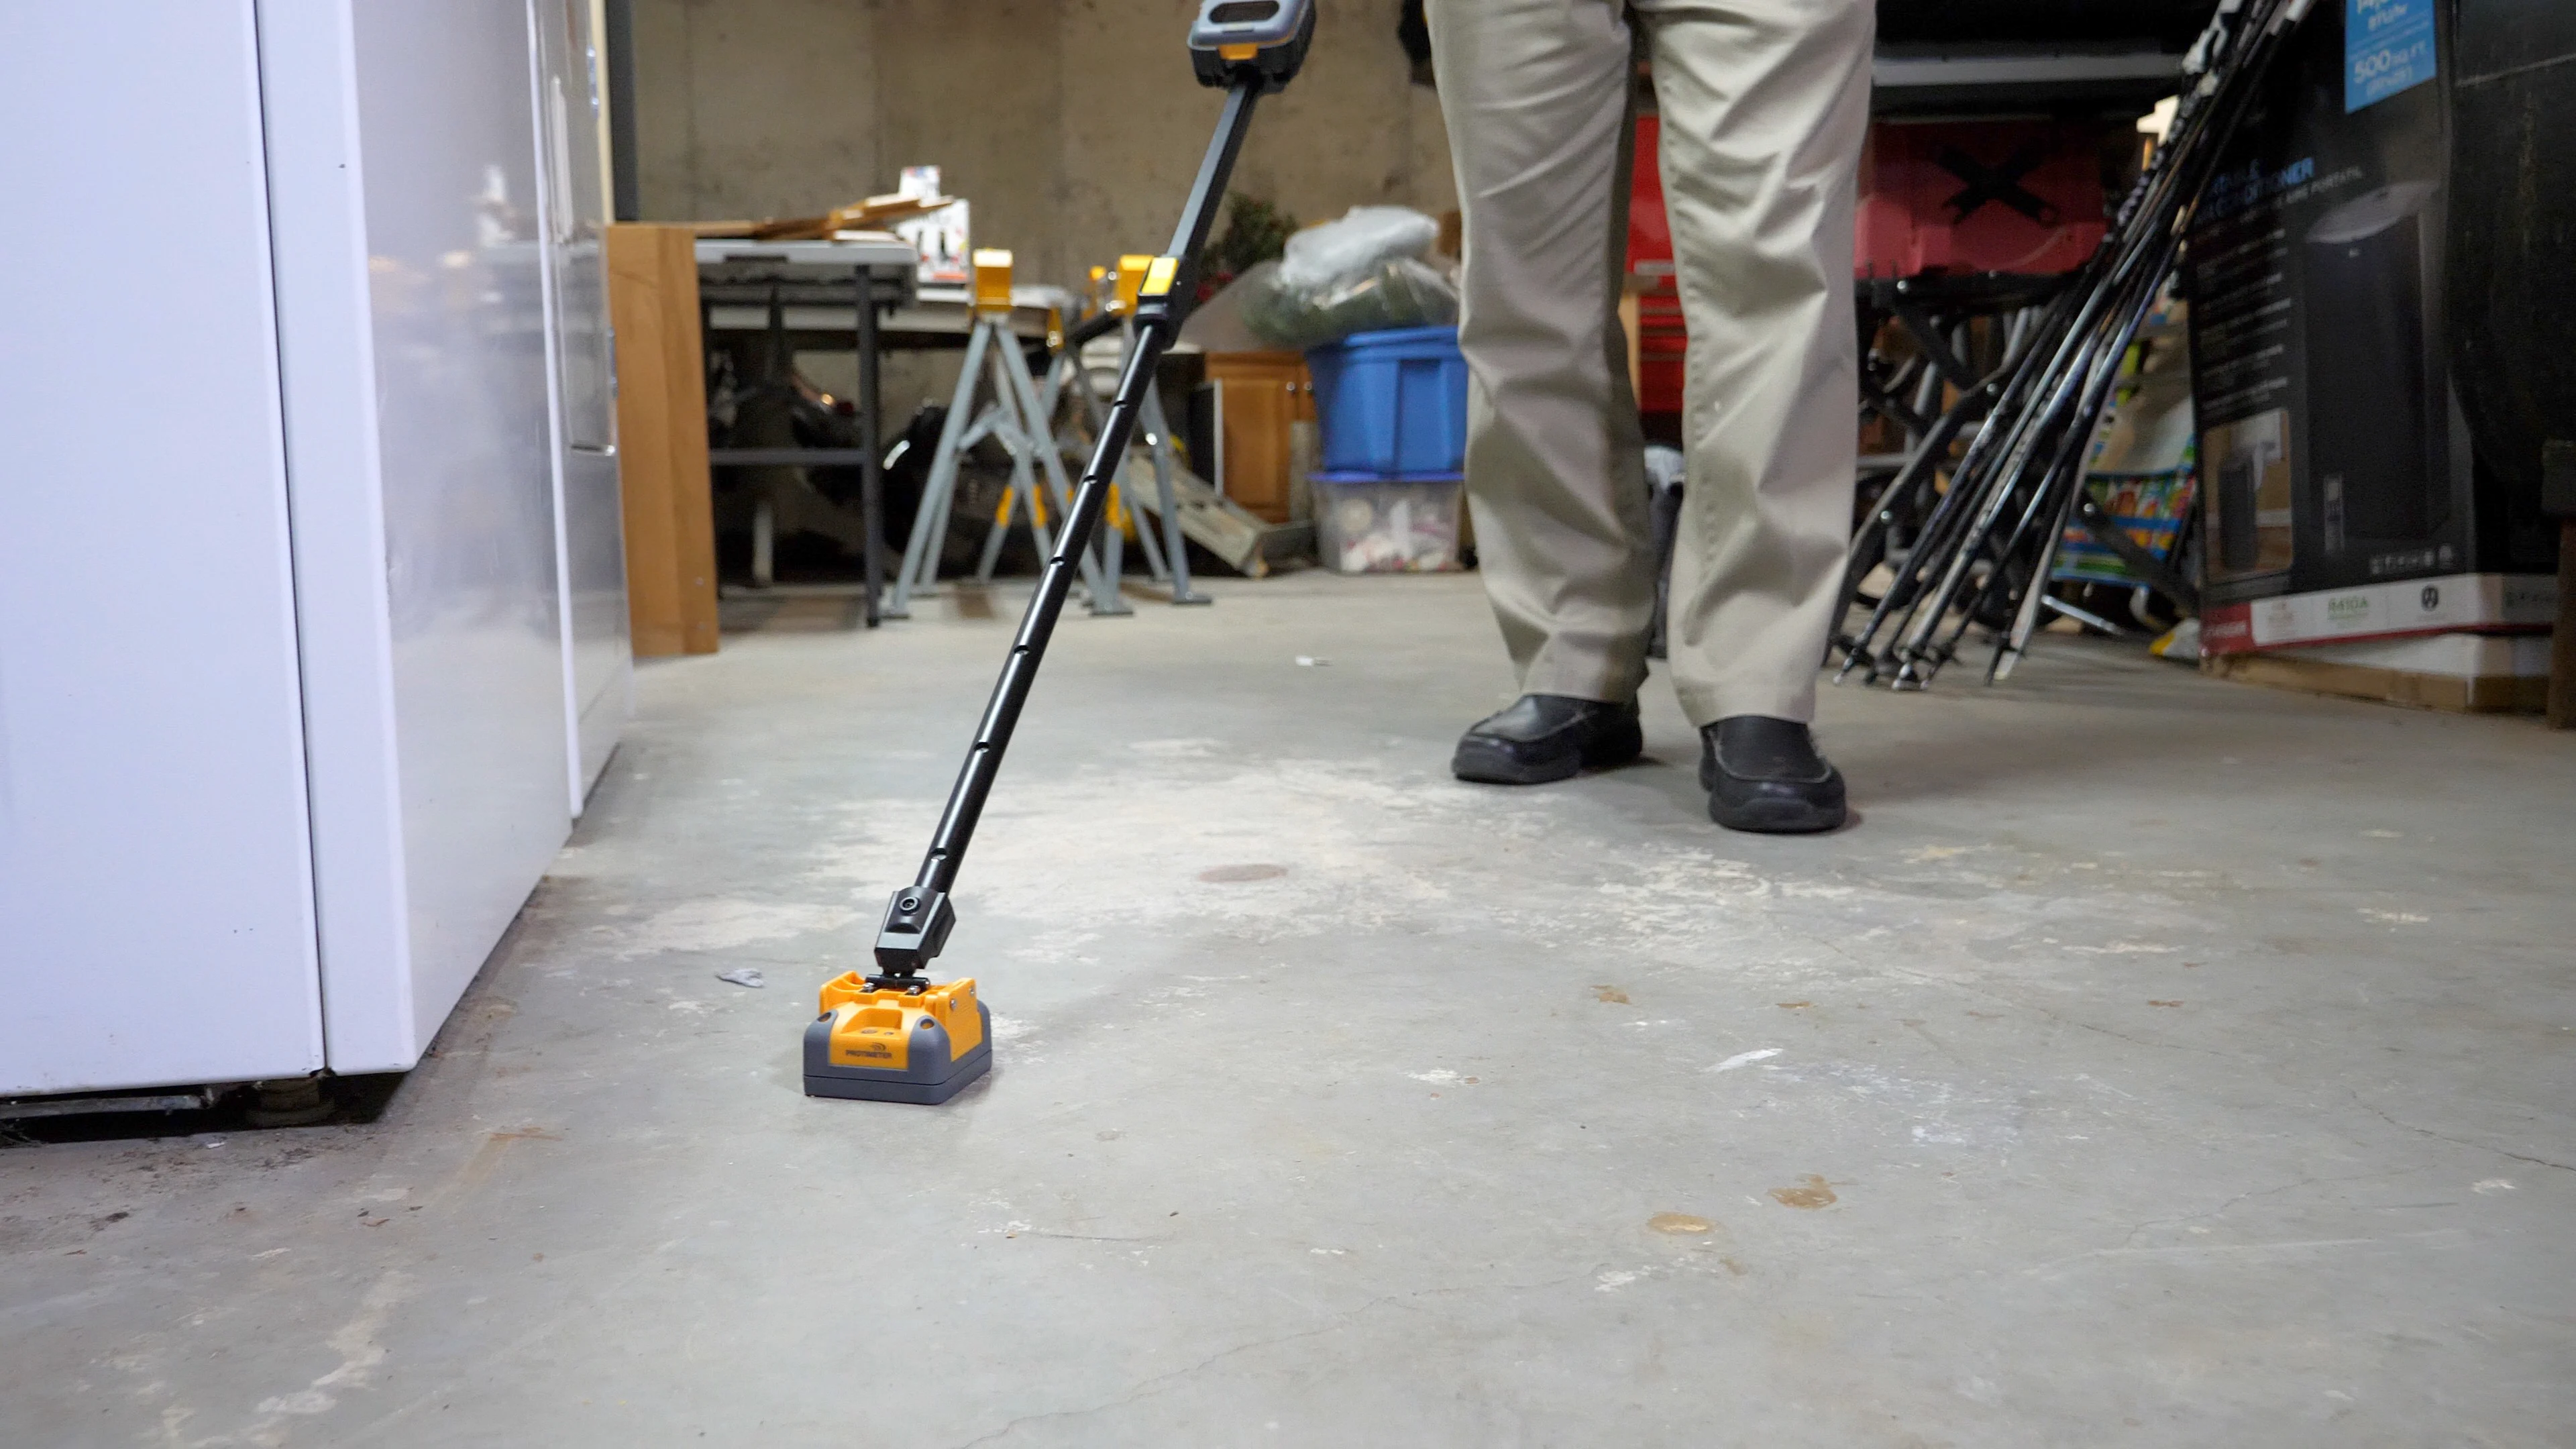
2. Concrete Basement Floors
A home inspection for basement moisture should absolutely include testing its concrete floor, especially if the air smells damp or there’s apparent mold.
Despite being one of the hardest materials, concrete still contains moisture -- it’s made using water, after all. Once cured, concrete is porous, allowing moisture to easily pass through it.
By visual inspection, a concrete basement floor may appear dry. But because of its composition and proximity to the vapor barrier underneath a foundation, a basement floor may register a high moisture content. While the floor itself may be OK with a higher moisture presence, other materials around it, such as wood and drywall, may be moisture-compromised.

3. Attics
Dark, often cramped, unventilated and not regularly visited, attics are a prime location for moisture to get inside a home. That’s because they have plenty of access points for moisture, such as:
- Faulty seals around chimneys
- Vents
- Ducts
- Roof penetrations (nails holding shingles down)
Many homeowner think of attics as almost a separate entity from the rest of a building. However, attics may be home to moisture issues that affect the rest of the structure -- even down to the basement.
4. Crawlspaces
Another area of a home that’s small and cramped, crawlspaces can face the same problems from moisture as a full-size basement.
As crawlspaces have concrete floors, there’s a higher probability for moisture content in the space and surrounding materials. And like an attic, moisture issues stemming from a crawlspace can make their way to other parts of a home.
5. Around Windows and Doors
A literal gateway to the outside, windows and doors are prime locations for moisture to make their way inside.
Because of their exposure to both indoor and outdoor environments, condensation in the area immediately surrounding a window or door may be in issue in spaces you can’t see, such as the wall cavity where either is installed.
4 Often-Overlooked Spots in Home Moisture Inspections
When conducting a home moisture inspection, be sure your checklist also includes these places that are sometimes forgotten:
- Around bathroom and kitchen fixtures
- Near appliances
- Exterior Walls
- Baseboards
1. Around Bathroom & Kitchen Fixtures
In bathrooms and kitchens, most fixtures are hooked up to water lines and a drain.
Over time, components of those fixtures and their plumbing may start to fail. Pipes come loose or crack. Seals deteriorate. Valves seize. All of these issues are a recipe for slow leaks, which, gone unnoticed, cause moisture damage throughout the rest of a home.
Checking areas around plumbed fixtures helps you zero-in on the source of moisture -- a pipe’s leak may be a few feet away from the fixture itself.
 2. Near Appliances
Just like bathroom and kitchen fixtures, some major appliances are also tied into a home’s plumbing infrastructure (dishwashers, refrigerators, washing machines). And that means they’re subject to the same issues that cause leaks.
But unlike fixtures, appliances may also malfunction and create a moisture issue. For instance, a refrigerator’s defrosting drain line can become clogged, causing water to pool underneath the appliance for months before it’s even noticed.
3. Exterior Walls
Home inspections for moisture in walls and ceilings should always include those on the outside of a structure.
Always exposed to the elements and humidity, a home’s exterior walls are on the front lines of stopping moisture invasions. If not properly sealed or protected, exterior walls can become inundated with moisture, before allowing it to make its way inside a home. Inside a wall cavity -- an area of a home that’s not visible -- moisture causes a host of issues, such as:
- Rotting
- Mold growth
- Wood and drywall deterioration
4. Baseboards
Straddling both the floor and a wall of a space, baseboards shouldn’t be forgotten about in your inspection.
Typically made of wood, baseboards absorb and release moisture to reach the same moisture content level as materials around it. Moisture present in baseboards is a good indicator of moisture in nearby materials -- and merits further testing.
Moisture Meters for Home Inspections: What to Choose
Knowing where to test for moisture is half the battle when completing a comprehensive inspection.
The other half?
Bringing the right tools.
When selecting a moisture meter for home inspections, you have two choices: pinless and pin-type meters.
Pin-type meters use electrodes (pins) to gauge actual moisture content by measuring electrical resistance between the probes when touching the surface of a material. Readings are presented as a percentage based on a scale of wood moisture equivalencies (WME) regardless of the type of material being tested.
Pinless moisture meters are used to locate moisture in a material. Using non-invasive radio frequencies, pinless meters detect dampness by assessing the average moisture of a material within its depth of measurement.
For a home inspector’s toolbox, there isn’t a choice -- it should include both types of meters. Having both tools at the ready lets you not only locate the source of moisture, but also confirm the exact extent of its presence.
Resource: How do you take readings the right way with a professional moisture meter and what do they mean? Check out our article, “Moisture Meter Readings: Taking & Interpreting Accurate Measurements.”
What’s the Best Moisture Meter for Home Inspections?In our eyes, there are two: The SurveyMaster and the MMS3. The SurveyMaster is a fan favorite of Protimeter devotes. With the capabilities of both a pin-type and non-invasive meter, the SurveyMaster makes it easy to take readings quickly and accurately and with one hand. As a dual-function meter, it lightens your load, too. The MMS3 is our all-in-one meter featuring Bluetooth technology. Boasting the functionality of a pin-type and pinless moisture meter, the MMS3 has another trick up its sleeve: it can also function as a hygrometer. What’s more, it has an infrared (IR) laser, too. |
Moisture Meter for Home Inspections | Completing Comprehensive Surveys
A home inspection for moisture shouldn’t feel like a treasure hunt that’s doomed to fail because you forgot a map and a shovel. With the right tools and a plan of attack, you’ll never need to re-inspect a property. The final report you produce is one that speaks for itself.
What Else Should You Be Aware of for Home Moisture Inspections?
Dig in deeper to improve your strategy for measuring moisture in buildings:
